 Duluth Water Leak Detection Pros
What Happens During a Leak Inspection Visit in Duluth, GA?
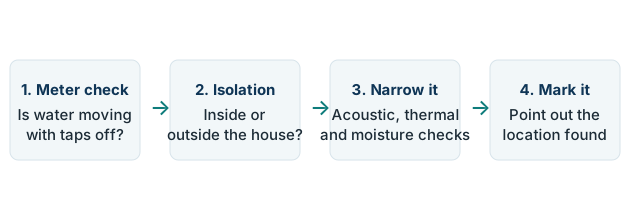
A leak inspection visit in Duluth, GA starts with what you are seeing and a meter test, then an isolation test separates an inside leak from a buried line. Checks that fit the symptoms narrow the area, the location is marked, and next step is explained before anything is opened.
Before the visit: what to note
Before a leak inspection visit in Duluth, GA, note five things. First, what you are seeing: a damp patch, a stain, a warm floor, a sound of running water, low pressure, or a bill that has risen. Second, when it started, and whether it is getting worse, staying the same, or coming and going. Third, what has changed recently, such as repair work, a freeze, or a new appliance. Fourth, the meter test result, if the test has been run. Fifth, where the meter and the house shutoff are, and whether the path to them and to the suspect areas is clear.
Nothing needs to be opened before the visit, and nothing should be. Opening a wall on a guess can miss the leak and add repair work for no gain. Clearing access is the useful preparation: a path to the meter, to the shutoff valve, and to the rooms where damp or sound is showing. If the shutoff is stuck or cannot be found, say so on the call rather than forcing it, since a forced valve can break and turn a leak into a flood.
First questions on arrival
The visit starts with questions, not with equipment. What is showing, and where exactly? When did it start? Has anything changed in the home, the plumbing, or the bill? What has already been checked: the meter, the toilets, the appliances? Which ZIP is the home in, and what type of property is it, since layout affects which checks fit? These questions are not small talk. They decide whether the leak is likely inside or buried, which checks to run first, and where to start narrowing.
Honest answers help more than tidy ones. An intermittent sound, a patch that dries and returns, or a bill that rose slowly over months are all useful, even if they feel vague. The inspector is building a picture of a leak that cannot be seen, and every symptom that is described accurately narrows the search. If something is unknown, saying so is better than guessing, because a guessed symptom can send the checks to the wrong part of the home.
Step 1: the meter test
The meter test comes first because it answers the most basic question: is water escaping at all? With every tap, toilet, and appliance off, the meter is read, time passes, and the meter is read again. If it has moved, water escaped during the test. If it has not moved, no water escaped during that window. The test does not say where the water went. It only proves that the search is real, and gives a flow rate if readings and hours are recorded.
A moving meter does not prove a pipe leak on its own. A running toilet or a faulty appliance moves a meter too, which is why toilets and appliances are checked before conclusions are drawn. An intermittent leak may not run during the test window at all, so a still meter narrows the picture without closing the case. The meter result, whatever it is, is the starting point for the next step, not the verdict.
Step 2: the isolation test
The isolation test, often called the shutoff test, separates an inside leak from a buried line. The house shutoff valve is closed, and the meter is watched. If the meter stops, the leak is inside the house. If the meter keeps moving, the leak is in the buried line outside. That single sentence is the whole test, and it is worth knowing before the visit, because it explains why the shutoff location matters so much.
If the shutoff cannot be reached, is stuck, or cannot be closed fully, the test cannot do its job, and that limit is stated rather than worked around with a guess. A stuck valve is a repair matter of its own, and forcing it risks a break. When the test does run cleanly, it divides the whole search in two at once, which is why it comes before any listening or imaging equipment is used.

Step 3: narrowing with the right checks
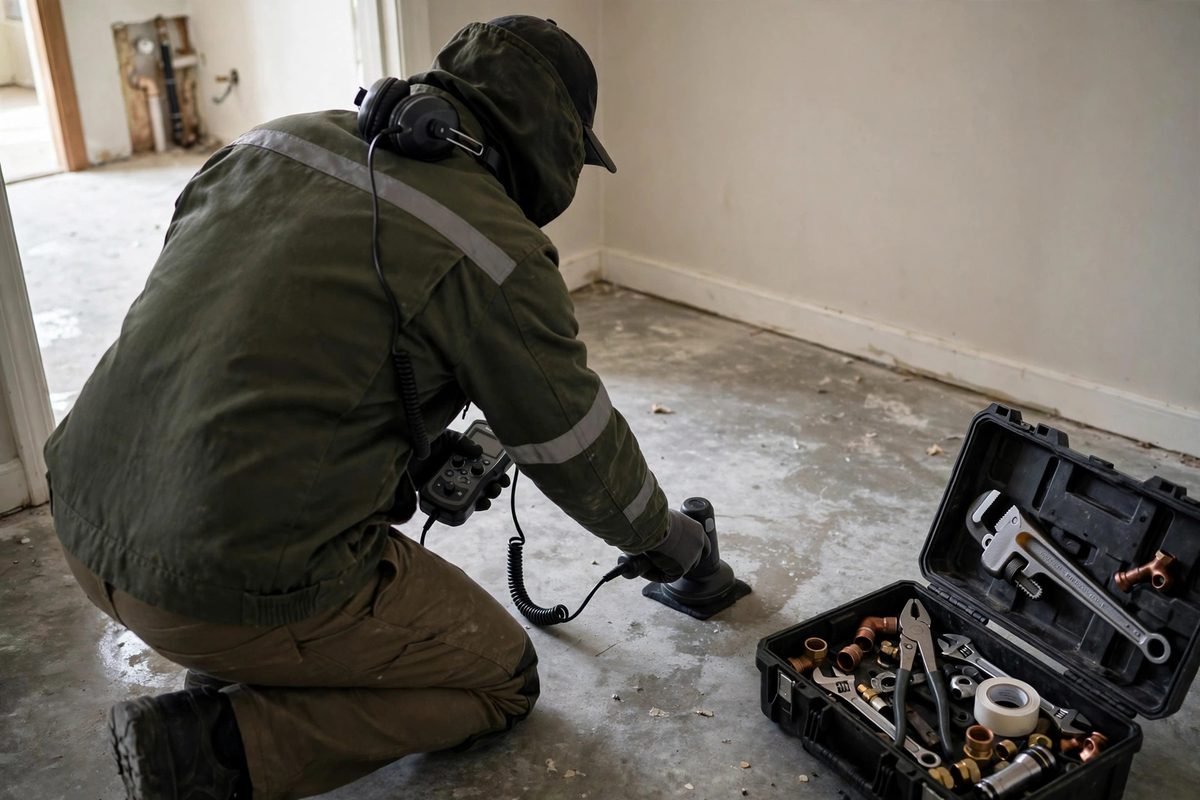
With inside or buried established, the visit narrows the area with the checks that fit the symptoms. Not every check is used every time. The choice follows what is showing: sound points to listening, a warm patch points to thermal imaging, damp spread points to moisture readings, and a suspected line problem points to pressure checks where valves and access allow. Using the fitting check, rather than every check, is what keeps the visit focused.
| Check | What it shows | Its limit |
|---|---|---|
| Acoustic listening | The sound of escaping water | Weak on quiet leaks |
| Thermal imaging | Warm-water patterns on surfaces | Weak on cold water; does not see through walls |
| Moisture readings | How far damp has spread | Shows spread, not source |
| Pressure checks | Whether a line holds pressure | Needs valves and access |
A location several checks agree on is more reliable than any single reading. If the checks disagree, the visit does not pick a favourite and mark it. Disagreement is reported as disagreement, with an explanation of what further checks are needed. That honesty is slower than a guess, but a guessed mark sends repair to the wrong place, which costs more than a second check.
Marking and the explanation
When the checks agree, the location is marked, and the visit ends with an explanation, not just a mark. What was found, which checks agreed, what was not found, and what the next step is. The mark is the point repair should start from, and the explanation is what lets the homeowner judge the repair discussion that follows. Photographs of the mark, if taken, belong to that explanation, and the homeowner should be able to point to the mark and repeat back what it means.
If the result is inconclusive, the explanation covers that too: which checks agreed, which did not, and what further checks are needed. Inconclusive is a real result, not a failed visit, because it stops a wrong opening. The next options are discussed on the spot, including whether a further check is worth running, rather than leaving the homeowner with a shrug and a bill for a guess.
After the visit: what happens next
The repair discussion starts from the mark and the explanation. The repairer can see where water was found, which checks agreed, and what was not found, and that record is what the repair scope is built on: whether the fix is a spot repair at the mark or a section replacement, and what opening the repair will need. Ask the repairer to confirm the scope and the price before opening starts, since the detection price and the repair price are separate, and the repair scope is only known once the location is known.
Keep the mark visible until the repair is done, and note it for your own records, including a photograph if that helps you point to it later. If the repair opening reveals more damage than expected, that changes the repair scope, not the detection result. The added work is priced and approved before it proceeds, and it does not mean the mark was wrong. It means the pipe or the surrounding material was in worse condition than the outside showed, which is common with long-running damp.
After repair, watch the same signs that brought the visit: the meter, the bill volume, and the damp patch. If a new damp area appears, or the bill volume stays high after repair, run the meter test again and call with the result. Do not assume the repair failed. A second, separate leak can exist alongside the first, and only a fresh meter result separates a repair that needs revisiting from a new leak that needs locating. The follow-up call starts the same way as the first: what is showing, and what does the meter do.
What inspection does not do
Detection and repair are different steps, and the visit does not include repair. It does not open walls, floors, or ground to search, and it does not promise a same-visit repair, because repair is discussed after the location is known. No fixed visit time is published, since the time depends on the property, the leak type, and the checks needed, and it is confirmed on the call. No single published price exists either; the price is confirmed on the call before work starts.
Those limits are not small print. They are the reason the visit can be trusted: nothing is opened on a guess, nothing is repaired before it is located, and nothing is promised that depends on facts not yet known. A visit that finds the leak, marks it, and explains it honestly has done its job, even when the repair that follows is a separate conversation with a separate price.
Common questions about checking a water meter for a leak
How long does a water leak detection visit take in Duluth, GA?
No fixed time is published for a visit. The time depends on the property, the leak type, and the checks needed, and it is confirmed on the call. That honest answer matters more than a fixed range, because a hidden slab or buried leak needs different narrowing than a visible wall damp patch.
Do I need to be home during the visit?
Access is needed to the meter, the house shutoff, and the areas where damp or sound is showing, so ask on the call who needs to be present and what access to leave clear. No attendance rule is published on this site, and the visit cannot start without access to those three places. If you cannot be present, say so on the call and agree who will let the visit in.
Will you open walls or floors to find the leak?
No. Detection does not open walls, floors, or ground to search for a leak. Checks narrow the area first, and the location is marked second. Opening happens only at the marked point, as a repair step, and it is discussed after the location is known. If a check points to a place that cannot be reached, that limit is stated instead of opening on a guess.
What if the checks do not find the leak?
Then the result is stated as inconclusive, not guessed. A quiet leak, an intermittent leak, a lack of access, or checks that disagree can all leave a location unproven. The visit explains which checks agreed, which did not, and what further checks are needed. No location is marked on a guess, because a wrong mark sends repair to the wrong place.
Should I do the meter test before you arrive?
It helps, but it is not required. The meter guide on this site walks through taps off, read, wait, read again, and the shutoff test. Bring the result if you have it, including the readings and the hours between them. If you have not run it, the visit starts with the meter test anyway, so nothing is lost by calling first.